
How is a Gunite Pool Made? A Step-by-Step Guide to the Construction Process
- Sep 18, 2025
- 10 min read
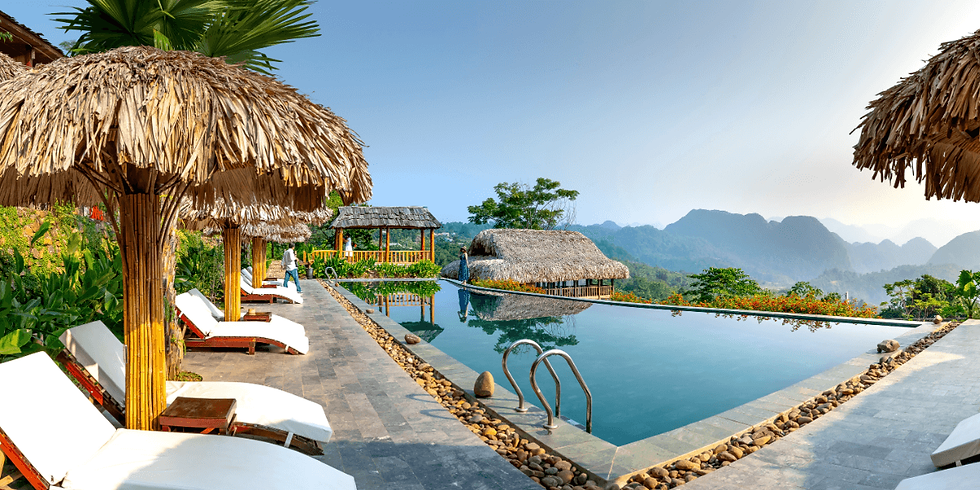
If you’re asking how is a gunite pool made, you’re already looking past prefab and into true customization. Gunite pools are built in place, so the shell conforms to your site and your style. For example, baja shelves, integrated benches, attached spas, and water features, all with crisp structure and long-term durability.
Ferrari Pools: Custom Outdoor Living spent decades refining the craft: precise engineering, strong steel, disciplined plumbing and electrical, and a finish that reads modern and lasts. This is our guide that walks the process step by step so you understand what happens (and why) before concrete ever meets steel.
Key Takeaways
A gunite pool offers unmatched customization, from shape to features.
The build process moves in clear stages, each adding strength and detail.
With proper care, a gunite pool shell can last for decades.
Glossary in 60 Seconds: Gunite vs. Shotcrete (and why it matters)
Both build a concrete pool shell. Each is pneumatically applied concrete shot over steel rebar to form the pool walls, floor, steps, benches, and bond beam—the backbone of a concrete swimming pool.
Gunite (dry-mix) — what we use
Dry sand plus cement travel through the hose; water is added at the nozzle. This gives our crew control at placement, lets us pause/restart cleanly, and makes sculpting shelves, raised details, and tight radii easier, which is ideal for custom pool design and complex pool layout.
Shotcrete (wet-mix) — good to know
Concrete arrives premixed from the plant and is pumped to the nozzle. It’s consistent and fast, but scheduling hinges on batch-plant timing and truck access.
Why we specify gunite
Precision at the nozzle for dense, uniform sections and crisp geometry.
Flexibility on tight lots and long hose runs.
Cleaner shaping for a monolithic gunite shell with fewer compromises.
On-site, here’s what you’ll notice.
A tied rebar cage inspected by the local building department.
The crew shooting dry mix and adding water at the nozzle (gunite application), removing rebound for maximum strength.
The shell being lightly watered during the curing process to help the gunite cure before tile and pool plaster.
Bottom line: both methods can produce durable concrete pools; the difference is execution. We build gunite for superior control, detail, and finish so the pool shell supports the design you actually want.
Design, Engineering, and Permits

Before we bring equipment into your yard, we slow down and design with you. This phase sets the look, the structure, and the schedule so construction runs clean and the finished gunite swimming pool feels intentional from day one.
Site study & concept design
We start on site by walking grades, checking access for machinery, noting sun/wind, drainage, and utilities. From there, we build a 3D pool layout that clarifies pool shape, steps and benches, tanning ledges, an attached spa if you want it, and how the pool deck will move people around the space.
We also place the equipment pad (pump, filter, heater/heat pump, automation) where it’s serviceable and quiet.
Structure: Engineering the shell
Next, concept becomes structure. We engineer wall and floor thicknesses, the gunite bond beam, and a steel rebar schedule for corners, raised beams, sun shelves, and water features. These details support the gunite process and give the shell its strength and geometry.
Permits, approvals & utility locates
We handle the paperwork: municipal/HOA permits, zoning (setbacks, barriers, lot coverage), and utility locates. That way, trenching for the plumbing crew, electrical conduit/electrical lines, and gas lines is safe, code-compliant, and sequenced to avoid delays once construction begins.
Systems & performance decisions
Early choices shape how the entire pool performs: return and skimmer placement, drain layout, light niches, and your preferred level of automation. We also align startup water chemistry to protect the pool’s surface and final finish coat. With drawings stamped, permits in hand, and trades scheduled, the build (excavation, steel, and the gunite shell) can move forward without guesswork.
Layout & Elevation Set
Before the dig begins, we walk the footprint with you and lock in heights. This part is where a clean design becomes a buildable plan.
Walk the lines
We stake the perimeter to the approved plan using stringlines and a laser level, then paint the outline on the backyard surface. Corners, radii, steps, and ledges are marked so the pool builder and excavator read the same geometry in the field. A story pole (or marked tape) travels with us to keep every reference consistent.
Set the Elevations (Heights That Read Right)
We establish a permanent benchmark and confirm:
Coping elevation relative to patios, doors, and interior floors so thresholds feel seamless.
Waterline elevation (what your eye reads against the tile). A few millimeters off here and the line looks “tilted.”
Finished deck slopes, typically 1–2% away from the pool, to move water where it should go.
Small errors up front invite small cracks in logic later (uneven steps, awkward transitions). We eliminate them now.
Drainage plan (Don’t fight gravity)
We trace natural falls and set drainage paths before excavation: deck drains or discreet channels, plus any needed fill or grading to keep storm water away from the excavated hole. If groundwater is likely, we note where temporary dewatering can sit without blocking the route for heavy machinery.
Place the equipment pad (Serviceable + quiet)
We choose a pad location that’s ventilated, code-clear, and service-friendly—room for pool equipment (pump, filter, heater/heat pump, automation) with straight, supported runs for materials and lines. Sound and sightlines matter; we place it to perform without dominating the yard.
Pre-dig checks (Last looks, fewer surprises)
Here, we verify access width for trucks/rigs; protect stone paths and turf. We confirm utility locates again; mark gas and electrical routes to install later without crossing the dig. We also review subgrade assumptions—if we hit soft dirt or rubble, we’ll stabilize before we dig. And lastly, our team walks the layouts with the excavator and foreman so everyone shares the same picture of the construction sequence.
A precise layout makes the rest of gunite pool construction feel smooth, such as excavation cuts cleanly, the shell shoots to the right height, and the final phase (tile, plaster, deck) reads as one complete design.
Excavation & Soil Management
Once the layout is staked, the real transformation begins. Excavation crews carve the pool’s shape directly into the earth, following the approved plan with clean cuts. This is where the design first becomes three-dimensional.
As soil comes out, it needs to go somewhere. Some stays on-site to help with grading around patios or landscaping, but most is hauled off so the area remains safe and workable. Managing spoils well keeps the site tidy and prevents delays for the next trade.
Transitions and benches, like tanning shelves or integrated seating, are shaped right in the dig, so the gunite pool shell will later match the designer’s intent. At the same time, the equipment pad location is set and prepped. Many gunite pool builders pour the pad early so the plumbing and electrical crews have a stable platform for pumps, filters, and automation systems.
Steel Framework (Rebar Cage)
With the hole dug, the next step is steel. A rebar cage is tied in place across the floor, walls, and bond beam, forming the skeleton of the pool. This grid follows the engineered plan down to clearances and spacing, with extra reinforcement where steps, sun shelves, raised beams, or water features will be built.
To a pool designer, this is where structure meets artistry. The steel cage creates the foundation that allows the gunite crew to shoot concrete into a true monolithic shell. Without it, concrete structures wouldn’t achieve the same strength or longevity.
When the inspector signs off, the rebar cage is ready to carry the weight of thousands of gallons of water, the plaster crew’s finish, and years of use. In short, steel is what ensures the new pool performs as beautifully as it looks.
Rough Plumbing, Electrical, and Bonding
Before the gunite shell goes in, the hidden systems are placed. This is the stage where the pool’s performance is quietly built into the walls and floor.
Plumbing the pool
Crews run suction and return lines, along with skimmers, main drains, and specialty features like bubblers or waterfalls. Each line is pressure-tested before it gets buried, ensuring there are no leaks hiding under the concrete structure. A thoughtful pool designer maps these runs so water circulates evenly and the finished pool feels balanced and easy to maintain.
Electrical groundwork
Light niches and conduits are set in place now, so once the plaster crew finishes the shell, the lights will align perfectly. Automation systems, pumps, and heaters all tie back to this rough work—done right the first time, so everything operates cleanly once powered up.
Bonding for safety
Gunite pool builders also address a safety detail many customers never see: bonding. Steel rebar, the deck’s reinforcing grid, and nearby metals are connected together, and a water bond is added per code (NEC 680.26). This reduces stray voltage gradients around the pool, keeping swimmers safe while blending safety seamlessly into the build.
At this point, the groundwork for the pool’s systems is hidden but essential. When water finally fills the pool, circulation will be smooth, lighting will look intentional, and the entire structure will be electrically safe.
Gunite Application: Building the Shell
This is the day most of our customers remember—when the backyard suddenly feels like a pool. The nozzle crew arrives and begins pneumatically applying gunite over the steel rebar cage. Dry sand and cement travel through the hose, water is added at the nozzle, and the mixture hits the steel with force, locking into place.
From here, it’s equal parts engineering and craftsmanship. Crews shape, cut, and trowel the material to the final profile: crisp steps you’ll walk down every summer, smooth benches where friends will sit, the gentle radii that define the corners, and the bond beam that frames the entire structure.
There are key checks happening throughout: ensuring the right thickness in every section, removing rebound material (the overspray that can’t be reused), and compacting tightly around all plumbing and light penetrations. These details might not be flashy, but they’re what make the difference between a concrete structure that merely looks good and a gunite pool shell that will last decades.
When the crew wraps up, you can finally stand inside the new pool’s footprint and see its full shape—solid, permanent, and unmistakably yours.
From Curing to Equipment Setup
Once the gunite shell is in place, it needs time to strengthen. For about 28 days, we keep the surface moist by watering it daily with a hose. This simple step helps the shell cure evenly, reducing the risk of cracks and giving your pool the durability it needs. Weather can extend the timeline, but patience here pays off in decades of structural strength.
After curing, the details that define the pool’s look and feel are installed. Waterline tile is set with precision, coping is placed to frame the edge, and movement joints are added so the structure can flex naturally over time. We also double-check slopes so deck drainage flows away from the pool, keeping the area safe and dry.
Finally, the equipment pad comes to life. Pumps, filters, heaters or heat pumps, and sanitization systems (whether salt or automation) are mounted and plumbed in. Gas and electrical crews complete hookups to code, tying everything together into a system that’s efficient, safe, and ready for water. At this stage, the pool transitions from a shell of concrete to a complete structure built to perform.
Finishing Touches and the First Swim
With the structure and systems complete, the focus shifts to the details that transform a shell into a livable, inviting space.
Decking & hardscapes
The pool doesn’t stand alone; it anchors the outdoor room. Crews prep the sub-base and drainage, then pour concrete or set pavers with care. This is also when custom elements like outdoor kitchens, fire pits, or seating walls are integrated, so everything feels intentional and seamless.
Interior finish & fill
The interior finish gives the pool its final look and texture, whether plaster, pebble, or quartz. Once applied and acid-washed (if specified), the pool is filled immediately in one continuous process—pausing can leave a permanent ring line. For the next 30 days, we protect that fresh surface so it cures beautifully.
Startup & water chemistry
As the pool fills and circulation begins, we run the filtration system, brush the surface daily, and balance the water to protect the finish. At this stage, we also walk you through the equipment and automation so you’re comfortable with how everything works from the start.
Timeline: what affects duration
Every pool is different, and so is every timeline. Permits, inspections, weather delays, curing windows, material lead times, and even site access can stretch or compress the schedule. A realistic view is that building a gunite pool is a carefully sequenced project from design approval to your first swim.
Homeowner Quality Checklist
We always encourage homeowners to stay informed during the build. Here’s a quick checklist to keep handy at each stage:
Pre-gunite
Plumbing pressure-tested
Steel properly spaced and tied
Plumbing secured and supported
Post-gunite
Curing schedule in place (hose watering daily)
No visible rebound or cracks forming
Penetrations sealed cleanly
Pre-finish
Tile and coping aligned straight and level
Equipment tested for startup
Drainage slopes confirmed
Handover
Water chemistry plan explained
Safety covers, fences, and gates in place
Warranty packet provided and reviewed
This list gives you confidence that every step of your pool build is progressing exactly as it should.
Why Build with Ferrari Pools: Custom Outdoor Living
When you choose Ferrari Pools, you’re not just getting a swimming pool; you’re getting a complete outdoor living experience.
For decades, we’ve been designing and building custom pools, spas, hardscapes, and backyard amenities across New England. Every detail, from the steel under the shell to the tile you see every day, is handled by a team committed to precision and beauty.
If you’re ready to create a backyard that feels like a private resort, we’d love to help you start planning.
Frequently Asked Questions
What are the stages of building a gunite pool?
Design and permitting, excavation, steel framework, plumbing and electrical, gunite shell, curing, tile and coping, decking, interior finish, and startup.
What are the disadvantages of a gunite pool?
They take longer to build than fiberglass or vinyl pools, usually cost more upfront, and require periodic resurfacing to maintain the finish.
What is the life expectancy of a gunite pool?
With proper care and resurfacing every 10–15 years, a gunite pool shell can last 50+ years.
Is a concrete pool the same as gunite?
Gunite is a type of concrete pool. The difference is in how the concrete is applied—gunite is a dry-mix sprayed with water at the nozzle, offering more flexibility for custom shapes.


Comments